


The Complete Setup For Birdwatching While Travelling
As with choosing your binoculars, there is no universal answer when it comes to the complete setup to take with you on a birdwatching trip. The ideal equipment depends on the destination, the type of trip and the means of transport you use. Travelling by car obviously allows you to take much more equipment than travelling by plane with only carry-on luggage. Likewise, a hiking trip on foot means prioritising lightweight and compact equipment.
Nevertheless, there are some pieces of equipment that I consider essential for being able to observe birds in good conditions. After several trips and many outings in the field, I have ended up with two different setups: a minimal setup that I can easily take anywhere, and a complete setup that I prefer when travelling by car.
Why adapt your equipment to your trip?
It can be tempting to take all your birdwatching equipment with you when you go travelling. After all, you never know which species you might encounter or what observation opportunities might arise. But unless you are travelling around in a motorhome, carrying too much equipment can quickly become a burden.
The type of transport is an important factor to consider when choosing your equipment. If you are travelling in your own car or a rental car, weight and bulk are much less of an issue. You can easily leave some of your equipment in the vehicle and only take what you need for each outing. On the other hand, if you are travelling by plane, bus or train, every kilogram matters more. You need to be able to fit all your equipment into a suitcase or backpack. And transporting your gear between different locations can quickly become a problem if you are carrying too much.
The destination is, of course, another important factor. If you are heading to the coast or areas with lots of waders, a spotting scope can be extremely useful. But in the middle of a forest, it is of little use and simply becomes extra weight to carry. Things are also different if you are planning a lot of walking or hiking. Carrying a bag containing a camera, telephoto lens, spotting scope and tripod for several hours can quickly become tiring. In that case, I much prefer to reduce my equipment and keep only the essentials.
The goal is therefore not to have the most complete setup possible, but rather to have the equipment suited to the trip you are actually taking.
My minimal setup for a birdwatching trip
When I travel by plane or on a trip where I know I will be doing a lot of walking, I prefer a relatively minimalist setup that is as light as possible. My goal is to be able to observe and photograph birds without having to carry several extra kilograms of equipment.
My minimal setup consists of:
- Binoculars with harness
- Camera + telephoto lens
- 2 SD cards
- 3 batteries
- Battery charger
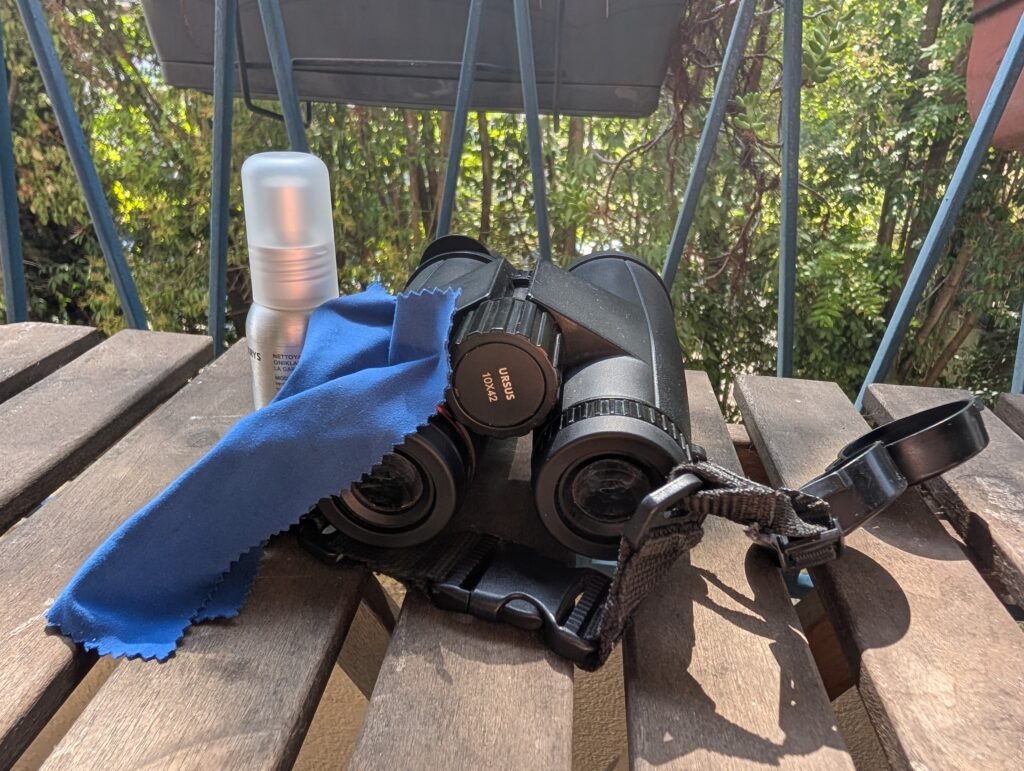
- Microfibre cloth
- Simple backpack
Binoculars & Harness
Binoculars are obviously essential. No need to argue about that. A birdwatching trip without binoculars isn’t really a birdwatching trip…
I also use a binocular harness to distribute the weight. It is particularly useful when walking for several hours. Unlike a traditional strap around your neck, the weight is distributed more evenly and the binoculars remain easily accessible.
A microfibre cloth is also always in my bag. It takes up virtually no space and can be very useful when a drop of water or a fingerprint gets onto an optical surface.
Camera & Telephoto Lens
For photography, I take my camera with my telephoto lens. I use a Canon R7 with a Sigma 150-600mm. It isn’t lightweight, but I really like this combination for photographing birds. It allows me to keep a visual record of my observations and helps me identify certain species when I can’t identify them directly in the field.
I prefer taking my camera rather than a spotting scope because the latter is very bulky, especially with the tripod. It can be quite complicated to transport on a plane. Depending on the location, there may also be relatively few situations where a spotting scope is actually needed.
Camera Equipment
I also take two SD cards. Even with a high-capacity card, I always prefer to have a backup option. A card can become full, fail or simply get lost. Having a second card means I can keep taking photos without any problems.
As for batteries, I usually take three batteries. This gives me a good safety margin, especially when observation days are long or when low temperatures reduce battery life.
The battery charger is obviously part of my equipment. After a day of birdwatching, I can recharge my batteries overnight and set off again the next day with everything ready to use.
30L Backpack
Finally, for this minimal setup, a simple backpack is enough. I use the 30-litre Quechua NH500 backpack, which doesn’t seem to be available anymore. You don’t necessarily need a specialised camera backpack when travelling light. The most important thing is that your equipment is properly protected and easily accessible.
My complete setup for a birdwatching trip
When I travel by car, I can afford to take much more equipment with me. This is the only situation in which my setup becomes truly complete. The main advantage is that I don’t have to carry all of my equipment with me at all times. I can leave some of it in the car and only take what I need for each outing.
So, this includes everything from my minimal setup, with a spotting scope and tripod added on top.
A spotting scope is particularly useful for outings in large open areas. It allows you to observe birds several hundred metres away, or even further, with much greater precision than with binoculars alone. This is particularly useful for waders, ducks, seabirds and birds of prey. In some destinations, it can genuinely change the way you go about birdwatching.
I also use a camera backpack when I take all this equipment with me. It is much larger, but it provides better protection for the camera and telephoto lens and, above all, makes it easier to organise all the different pieces of equipment.
I also allow myself to bring additional equipment. For example, I take a rain cover to protect all my equipment when the weather conditions become difficult. I can also bring other camera lenses, particularly for macro photography, a torch for night walks, or additional SD cards and batteries.
This setup is obviously much bulkier than the previous one. This is why I only really use it when travelling by car. In this situation, the benefits of having a spotting scope more than make up for the additional bulk.
How to transport your equipment on a plane?
Flying is probably the mode of transport that requires the most attention when travelling with birdwatching and photography equipment. There are a few rules and restrictions you need to be aware of.
Carry-on luggage
The principle I follow is quite simple: fragile and expensive equipment should stay with me whenever possible. The camera, telephoto lens and binoculars should ideally be carried in the cabin. Checked luggage can be subjected to significant impacts and can also be delayed or lost. When it comes to camera and optical equipment that can sometimes be worth several thousand euros, I therefore prefer not to take the risk.
You obviously need to comply with the size and weight limits allowed by the airline. With a 30-litre backpack, I have personally never had any problems, but this obviously depends on the rules applied by each airline.
Lithium batteries
Camera lithium batteries require particular attention when travelling by plane. Lithium batteries generally need to be carried in the cabin. I therefore keep them in a small transparent pouch or in their dedicated protective cases.
Travelling with a spotting scope and tripod
The spotting scope and tripod are the two pieces of equipment that make air travel the most complicated. It can generally be protected and carried in your cabin baggage if its size allows it. The tripod is more problematic because of its size. Depending on the model and the airline, carrying it in the cabin may or may not be allowed. It is therefore essential to check the rules before departure.
This is also another reason why I prefer to take my complete setup only when travelling by car.